Tradingby AiBlock
Bollinger Bands Divergence Confirmation: A Practical Guide for Crypto Traders
3 min read14 January 202646 reads
Written by

1 follower
🟠Helping creators get monetised 💯% free. Roasting all #shitposters & bad actors. Crypto enthusiast
Bollinger Bands Divergence Confirmation: A Practical Guide for Crypto Traders
What Are Bollinger Bands?
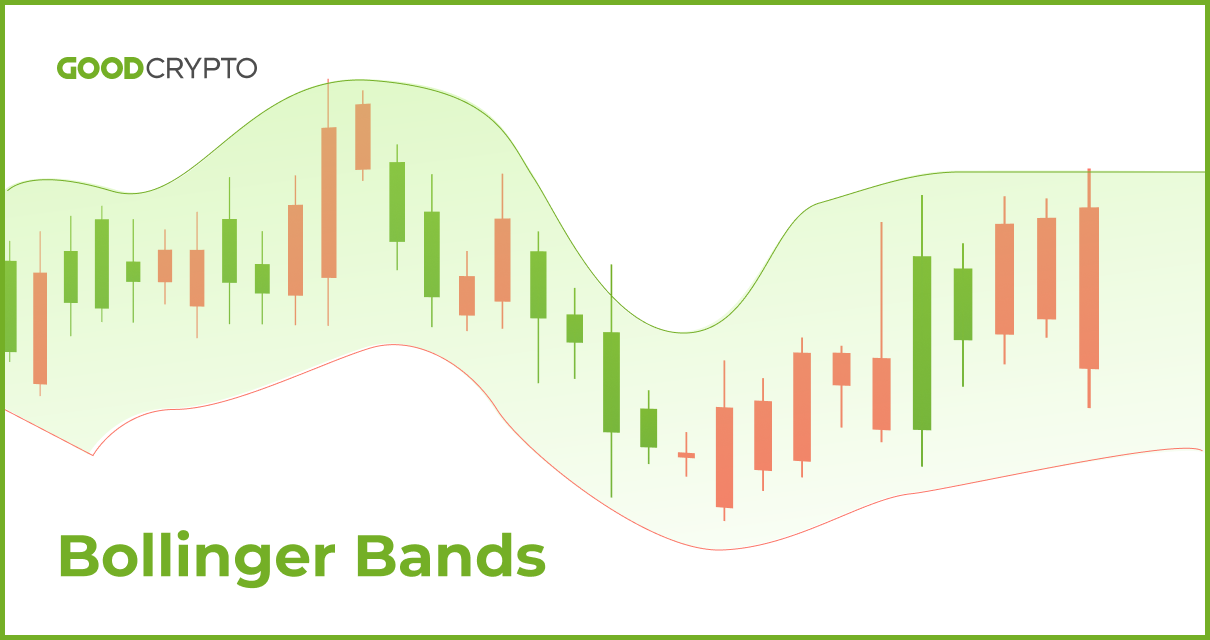
Bollinger Bands (BB) measure volatility and identify overbought/oversold conditions.
Standard settings:
- Middle band → 20-period Simple Moving Average (SMA)
- Upper band → Middle + 2 standard deviations
- Lower band → Middle – 2 standard deviations
Key behaviours:
- Wide bands → High volatility
- Narrow bands → Low volatility (potential "squeeze")
- Price touching upper band → Potential overbought
- Price touching lower band → Potential oversold
- Price closing outside bands → Strong momentum (rare, often reversal signal)

What is Divergence with Bollinger Bands?
Divergence occurs when price makes new extremes, but the bands (or price relative to bands) fail to confirm → weakening momentum.
Main types (focus on regular for reversals):
Regular Divergence (reversal signal)
- Bullish: Price makes lower low → but price does not reach lower band as deeply (or lower band makes higher low)
- Bearish: Price makes higher high → but price does not reach upper band as aggressively (or upper band makes lower high)
Bollinger Band Squeeze (bonus confirmation)
- Bands contract tightly (lowest bandwidth in recent period) → volatility compression → explosive breakout likely
- Direction determined by 9–15 EMA bias
Core Idea for Confirmation
Pair BB divergence/squeeze with the 9–15 EMA strategy:
- Divergence confirms potential reversals at trend extremes
- Squeeze confirms high-probability breakouts in trending markets
Always wait for price action + EMA confirmation — never trade BB alone.
Bullish Divergence / Squeeze Confirmation
Higher Timeframe Bias (4H)
- Price making lower lows near lower band
- Bullish divergence: Price fails to touch lower band as deeply as before
- OR clear BB squeeze (bands tightly contracted)
- Ideally near key support
Trend Confirmation (1H)
- 9 EMA preparing to cross above 15 EMA
- Price holding near or bouncing from lower/middle band
- Squeeze resolving upward or divergence visible
Entry Setup (15m or 1H)
- Price pulls back into 9–15 EMA zone (acting as support)
- Bullish candlestick pattern or close above middle band
- Post-squeeze: Price breaks above middle/upper band with volume
- Enter long on confirmation candle close
SL/TP
- SL: Below recent swing low or on close below lower band / 15 EMA
- TP: Minimum 1:2 RR | trail SL below new swing lows or middle ban
Bearish Divergence / Squeeze Confirmation
Higher Timeframe Bias (4H)
- Price making higher highs near upper band
- Bearish divergence: Price fails to touch upper band as aggressively
- OR clear BB squeeze
- Ideally near key resistance
Trend Confirmation (1H)
- 9 EMA preparing to cross below 15 EMA
- Price rejecting near upper/middle band
- Squeeze resolving downward or divergence visible
Entry Setup (15m or 1H)
- Price rallies into 9–15 EMA zone (acting as resistance)
- Bearish candlestick pattern or close below middle band
- Post-squeeze: Price breaks below middle/lower band with volume
- Enter short on confirmation candle close
SL/TP
- SL: Above recent swing high or on close above upper band / 15 EMA
- TP: Minimum 1:2 RR | trail SL above new swing highs or middle band
Conditions to Avoid
- No clear divergence or squeeze (bands normally wide, price walking one band in strong trend)
- Frequent false touches in choppy/range markets
- Trading against strong trend momentum (price consistently outside bands)
- Low-volume squeezes or divergences
Additional Tips
- Excellent on BTC, ETH, and volatile altcoins
- Use 1H–4H for spotting divergence/squeeze (lower timeframes too noisy)
- Combine with 9–15 EMA trend + RSI/MACD for triple confirmation
- Squeeze breakouts often give the biggest moves in crypto
- Risk 1–2% per trade and always backtest
Bollinger Bands divergence and squeeze provide outstanding volatility-based confirmation to the 9–15 EMA strategy — ideal for catching reversals early or riding explosive crypto breakouts.