Bitcoinby Virendra Rajnale
200 EMA Trendline Strategy – A Simple System That Works Only in the Right Market
3 min read28 January 202680 reads
Written by

The Core Rule (Very Simple, But Very Powerful)
This is the heart of the strategy:
If price is above the 200 EMA, we only look for long trades
If price is below the 200 EMA, we only look for short trades
That’s it.
No mixing.
No “maybe reversal”.
No “I’ll take one counter-trend trade just for fun.”
Because the moment you break this rule, the strategy loses its identity.
Why 200 EMA is the “Truth Line”
In real markets, 200 EMA acts like a filter.
Not magic.
Not a guarantee.
But it helps you answer one very important question:
Are we in a bullish environment or a bearish environment?
When the market is trending, price usually respects the 200 EMA like a boundary:
Above it → buyers have control
Below it → sellers have control
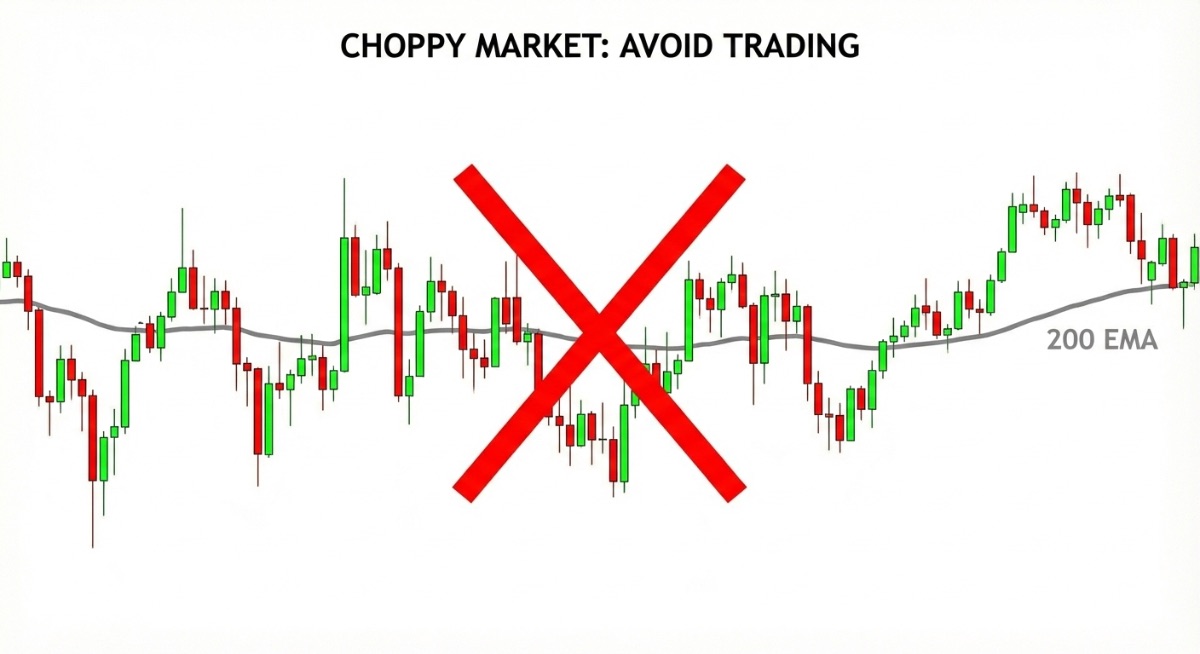
If price is cutting above and below it again and again…
that’s not a trend, that’s a trap.
Where the Trendline Comes In
Once you know the direction (thanks to 200 EMA), the next job is timing.
That’s where the trendline helps.
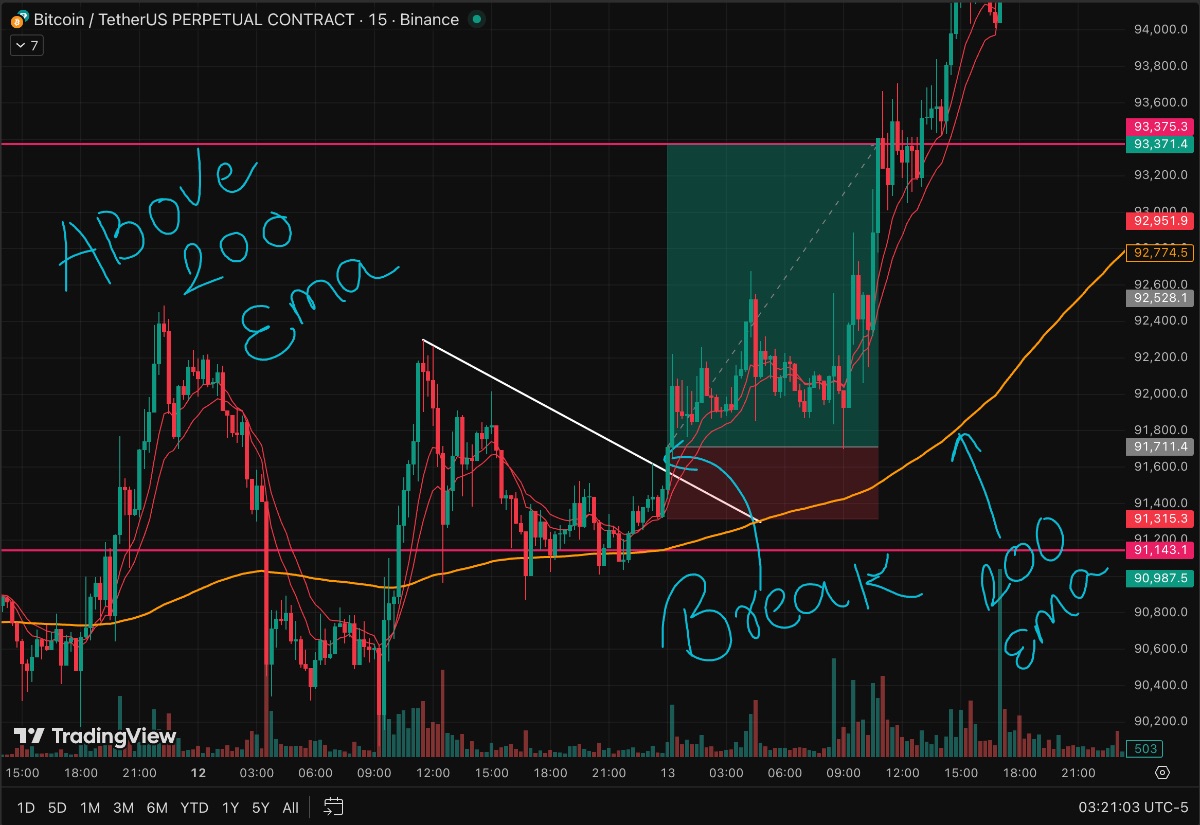
If price is above 200 EMA (Long-only mode)
You draw a trendline connecting higher lows.
You’re basically saying:
“Fine… I won’t chase the top. I’ll wait for pullbacks.”
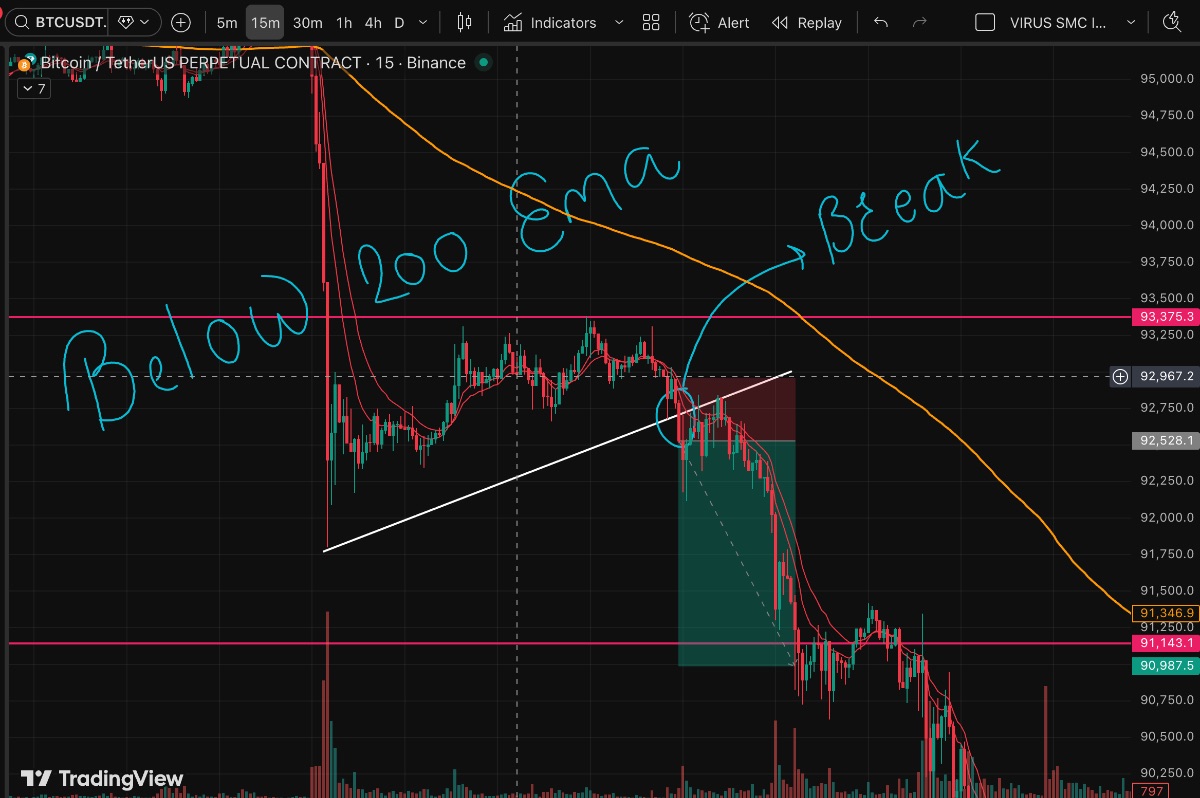
If price is below 200 EMA (Short-only mode)
You draw a trendline connecting lower highs.
Same idea, opposite direction:
“Let the market pull back… I’ll short the bounce.”
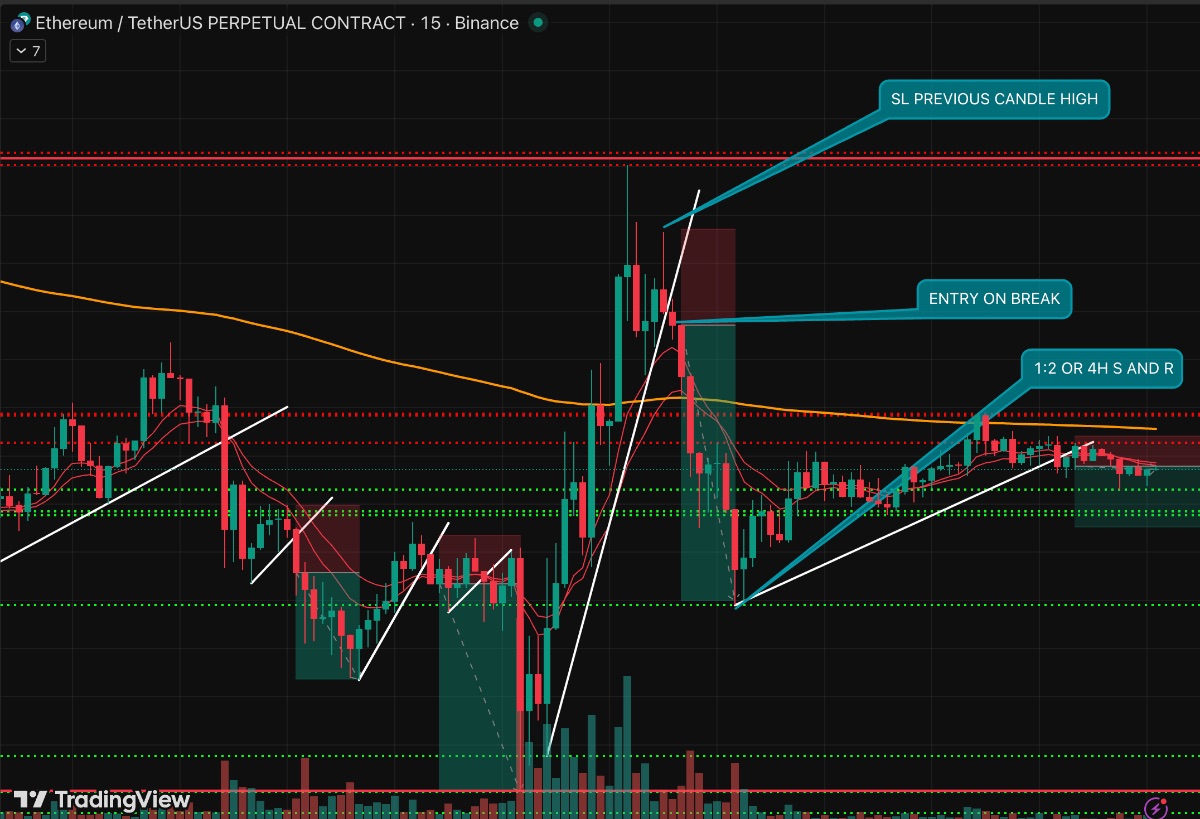
So the system becomes simple:
✅ Direction from 200 EMA
✅ Timing from trendline structure
The “Masala” Part: When You Should NOT Trade This Strategy
This is where most people lose.
They see 200 EMA… they draw a trendline… and jump in.
But the market isn’t trending properly.
Avoid if you see these signs:
Price stuck near 200 EMA like a magnet
Candles are messy, overlapping, full of wicks
Trendline breaks again and again with no follow-through
You feel like the chart is “arguing with you”
You can’t clearly say if the market is moving up or down
Because sideways markets don’t pay trend-followers.
They punish them slowly.
And honestly, that slow loss is worse than a clean stop.
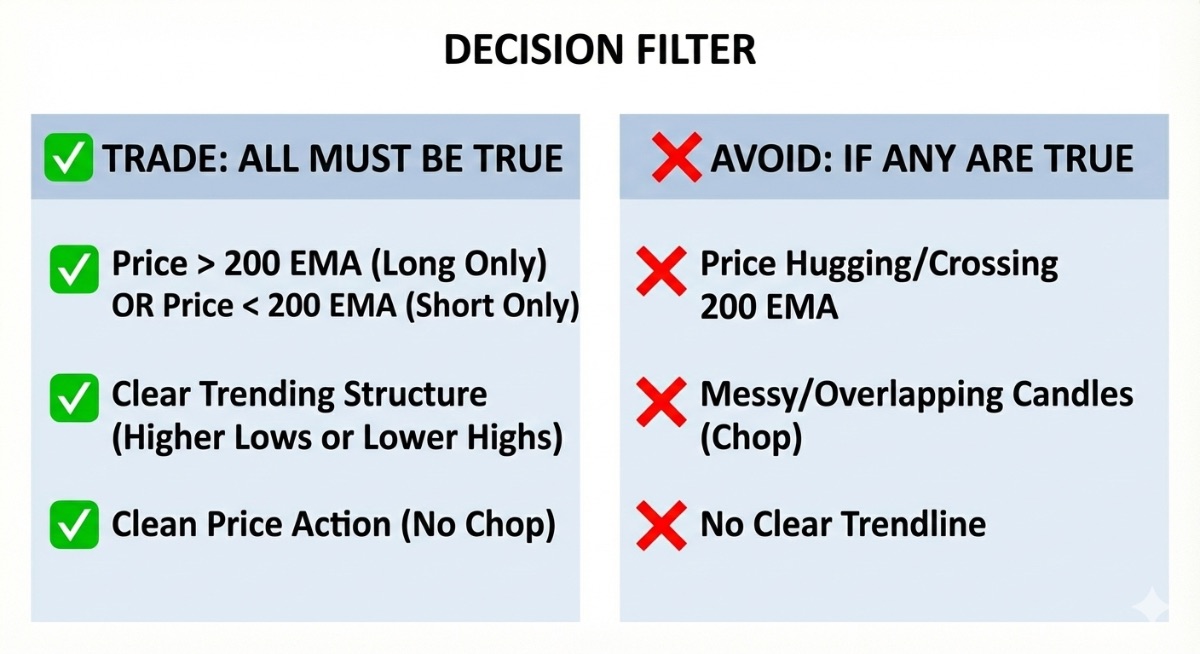
The Most Important Part: Final Decision Filter
This is your protection system.
You’re not asking:
“Where should I enter?”
You’re asking:
“Is this market even worth trading right now?”
If the environment is right → TRADE
If the environment is not right → AVOID
✅ Output Format (Use This Exactly)
EMA Bias (15m): <Long only / Short only / Neutral – Sideways>
15m Trend: <Trending Up / Trending Down / Sideways / Range-Bound>
Structure Quality: <Clean & directional / Choppy / In strong zone – risky>
Breakout Bias: <Bullish / Bearish / No clear bias>
Decision: <TRADE / AVOID>
Your Decision Rules (Simple & Strict)
✅ Decision: TRADE
Only when all of these are true:
EMA Bias is Long only or Short only
15-minute trend is actually trending (not just random movement)
Structure is clean (you can visually see direction)
Breakout bias matches the EMA direction
❌ Decision: AVOID
If any of these are happening:
EMA is flat / price is hugging it
Structure is choppy and confusing
Trend and EMA don’t match
Breakout direction is not clear
And yes — no entry, no target, no stop-loss here.
This filter is only about market condition.
Real Talk: This Strategy Makes You a “Selective Trader”
This system is not for people who want to trade every hour.
This is for traders who can sit and wait, and then attack only when the market is clean.
Because one good trending setup can pay more than 10 random trades in chop.
Final Words
The 200 EMA Trendline Strategy by Devansh Rai is beautifully simple:
Above 200 EMA → long mindset
Below 200 EMA → short mindset
Trendline gives timing
Decision filter saves you from garbage markets
If you follow it with discipline, it becomes less about “guessing” and more about executing.
And that’s where real consistency starts.