Technical Analysisby AiBlock
Awesome Oscillator Setups: A Practical Guide for Crypto Traders
3 min read24 January 202654 reads
Written by

1 follower
🟠Helping creators get monetised 💯% free. Roasting all #shitposters & bad actors. Crypto enthusiast
What is the Awesome Oscillator (AO)?
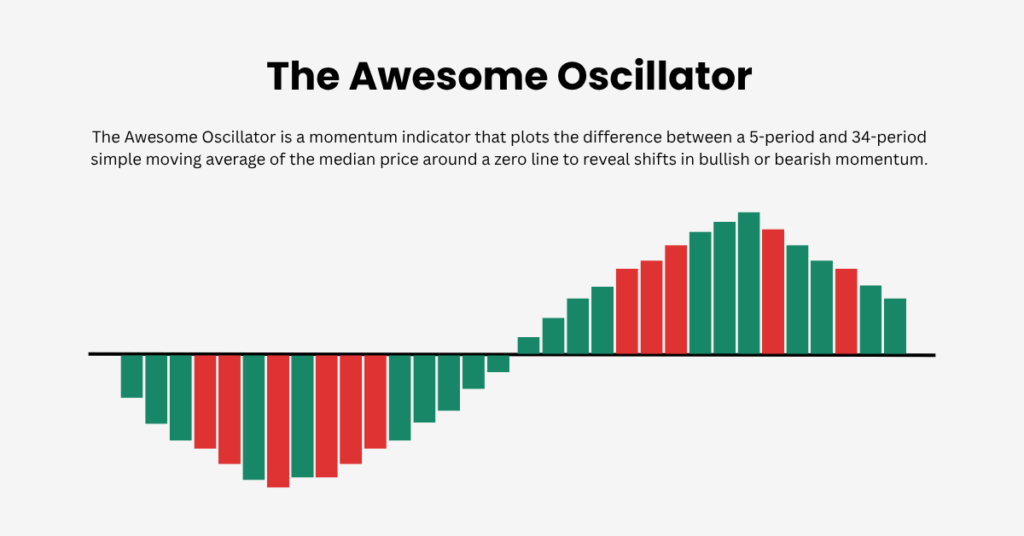
The Awesome Oscillator measures momentum by comparing a 5-period simple moving average to a 34-period simple moving average of the median price (high + low)/2.
Displayed as a histogram:
- Green bars → Growing bullish momentum (current bar higher than previous)
- Red bars → Growing bearish momentum (current bar lower than previous)
- Zero line → Key level for trend strength
Main signals:
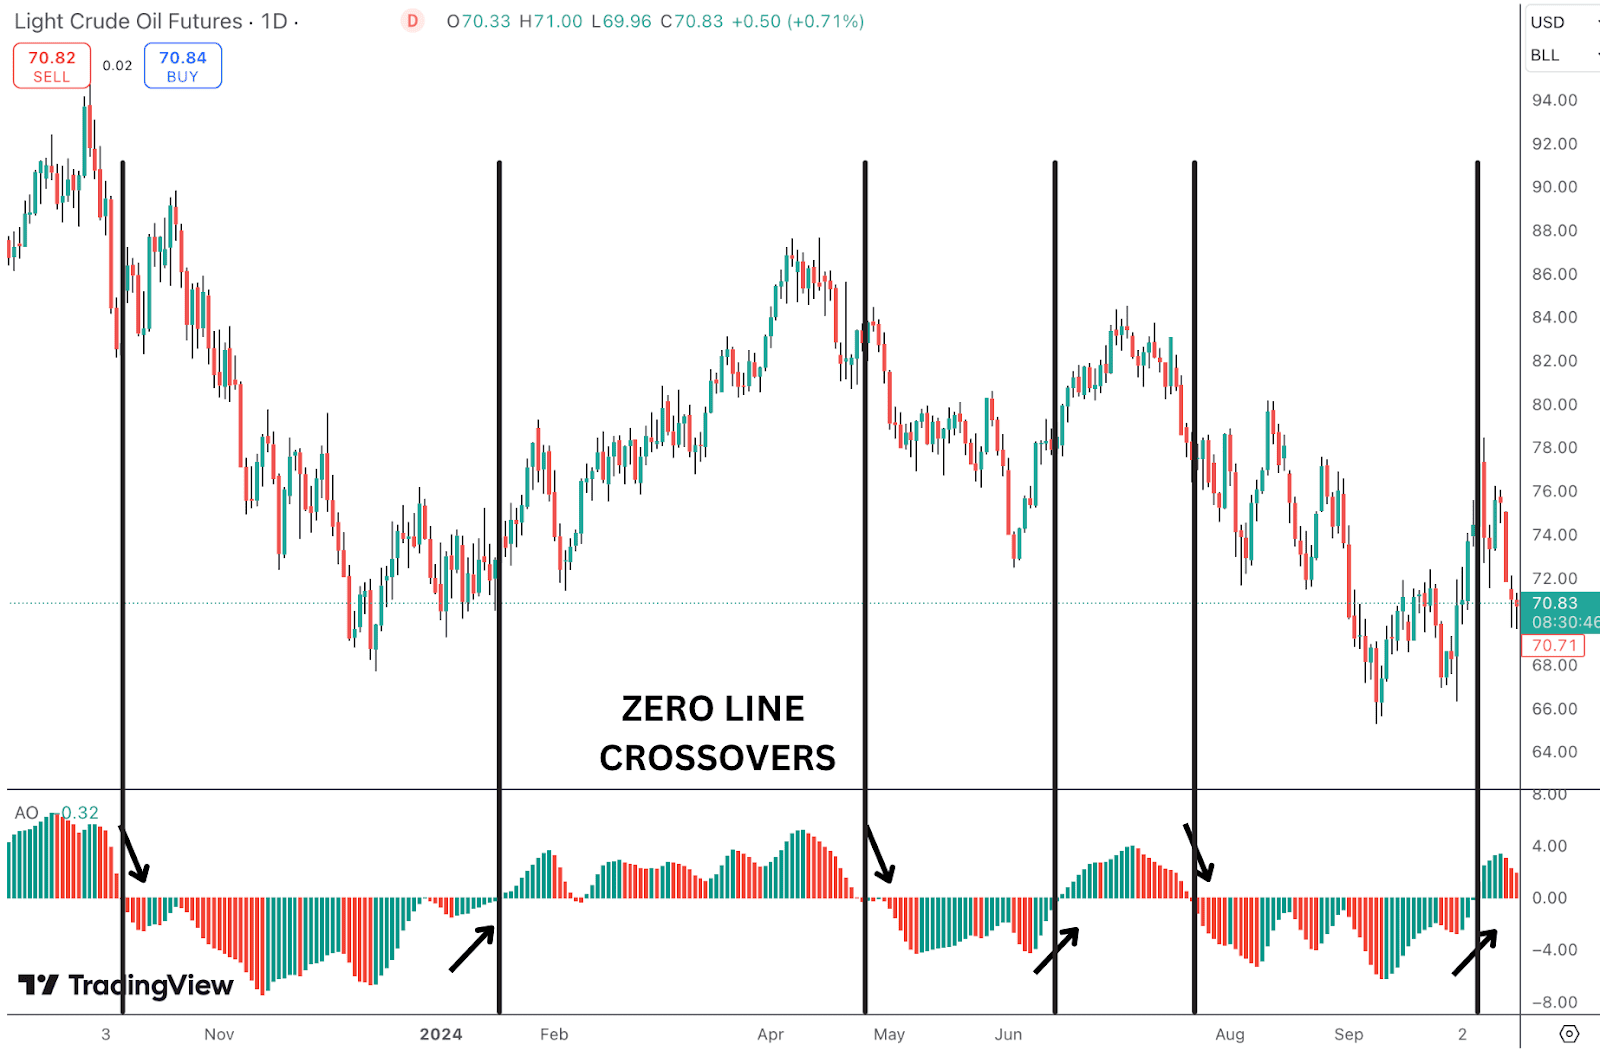
- Zero line crossover
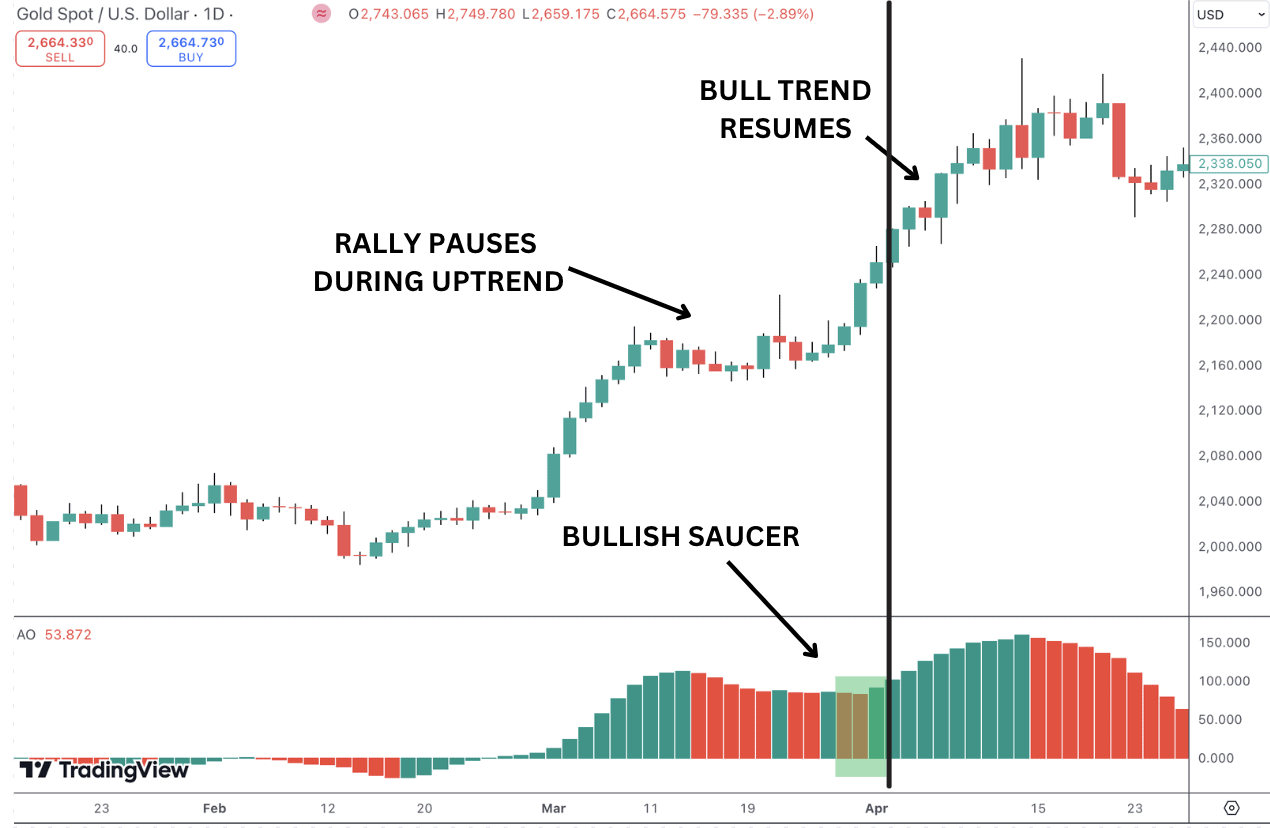
- Saucer patterns
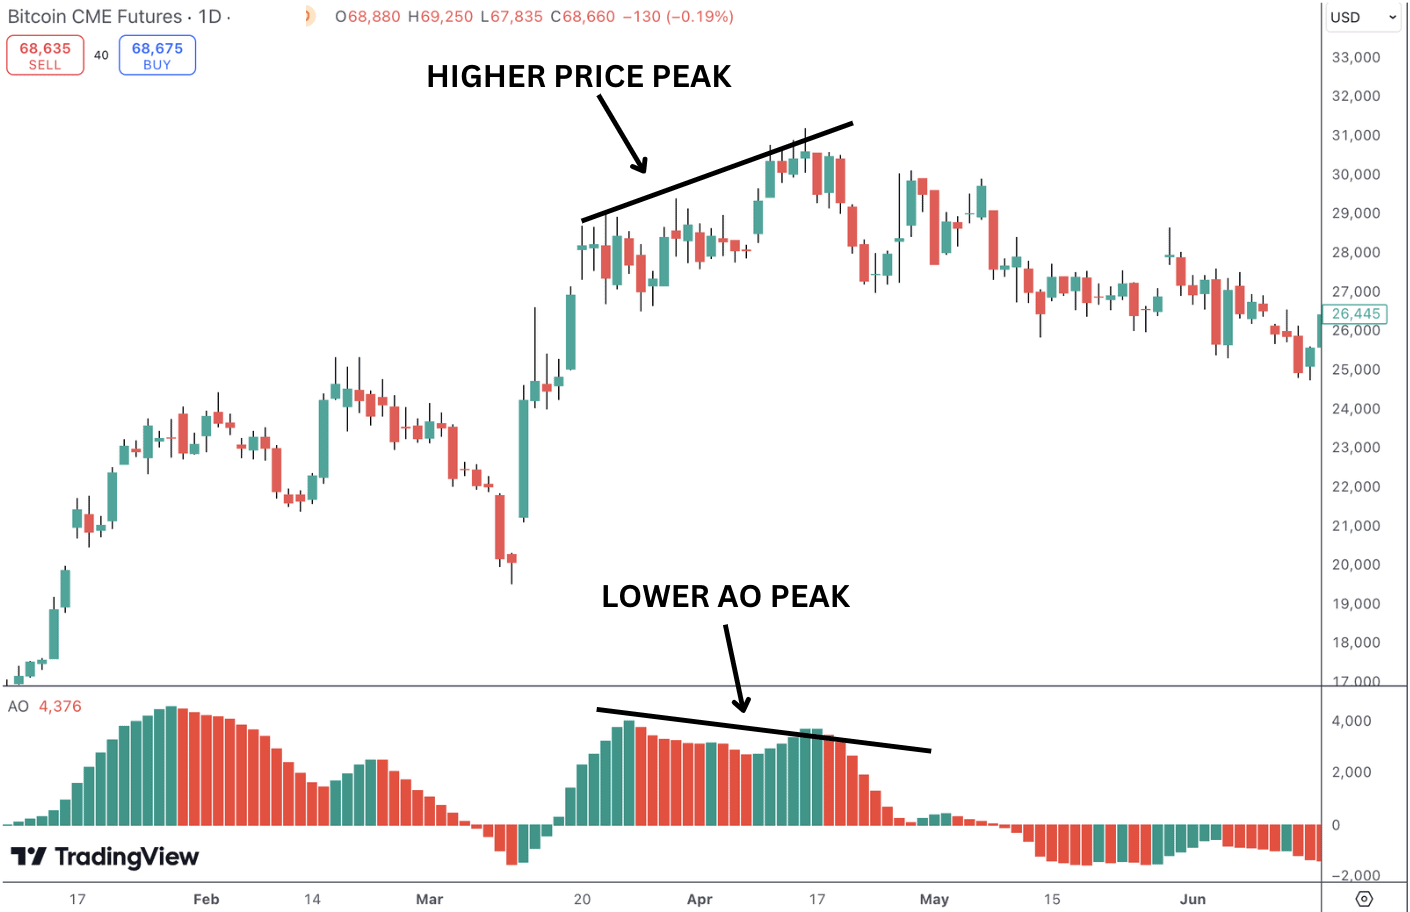
- Twin Peaks divergence
Core Idea for Confirmation
Pair AO with the 9–15 EMA strategy to confirm momentum strength:
- Bullish AO signals on pullbacks strengthen long entries in uptrends.
- Bearish AO signals on rallies strengthen short entries in downtrends.
Focus on:
- AO above zero + green bars → Bullish momentum
- Saucer buy (three-bar reversal above zero) → Early continuation
- Twin Peaks bullish (two lows below zero, second higher) → Reversal clue
Always align with EMA trend — AO filters weak moves.
Bullish Setup
Higher Timeframe Bias (4H)
- 9 EMA > 15 EMA with clear separation
- Price above both EMAs
- AO above zero line with growing green bars
- Saucer buy forming OR bullish zero cross OR bullish Twin Peaks
- Good volume supporting upside
Trend Confirmation (1H)
- 9–15 EMA zone acting as dynamic support
- AO histogram turning greener / saucer completed
- Price respecting EMA zone on pullback
Entry Setup (15m or 1H)
- Price pulls back into 9–15 EMA zone
- Wait for AO saucer buy (two decreasing red bars followed by green bar higher than previous) OR zero line cross up
- Confirm bullish candle close in EMA zone
- Enter long on signal confirmation
SL/TP
- SL: On close below 15 EMA or recent swing low
- TP: Minimum 1:2 RR | trail SL below new swing lows
Bearish Setup
Higher Timeframe Bias (4H)
- 9 EMA < 15 EMA with clear separation
- Price below both EMAs
- AO below zero line with growing red bars
- Saucer sell forming OR bearish zero cross OR bearish Twin Peaks
- Good volume on downside
Trend Confirmation (1H)
- 9–15 EMA zone acting as dynamic resistance
- AO histogram turning redder / saucer completed
- Price rejecting EMA zone on rally
Entry Setup (15m or 1H)
- Price rallies into 9–15 EMA zone
- Wait for AO saucer sell (two increasing green bars followed by red bar lower than previous) OR zero line cross down
- Confirm bearish candle close in EMA zone
- Enter short on signal confirmation
SL/TP
- SL: On close above 15 EMA or recent swing high
- TP: Minimum 1:2 RR | trail SL above new swing highs
Conditions to Avoid
- AO frequently crossing zero with no clear bar colour change (choppy momentum)
- Signals against 9–15 EMA trend direction
- Flat/overlapping EMAs or range-bound price
- Weak saucers far from zero line
Additional Tips
- Strong on BTC, ETH, and major altcoins
- Use 1H–4H for primary signals, 15m for entry timing
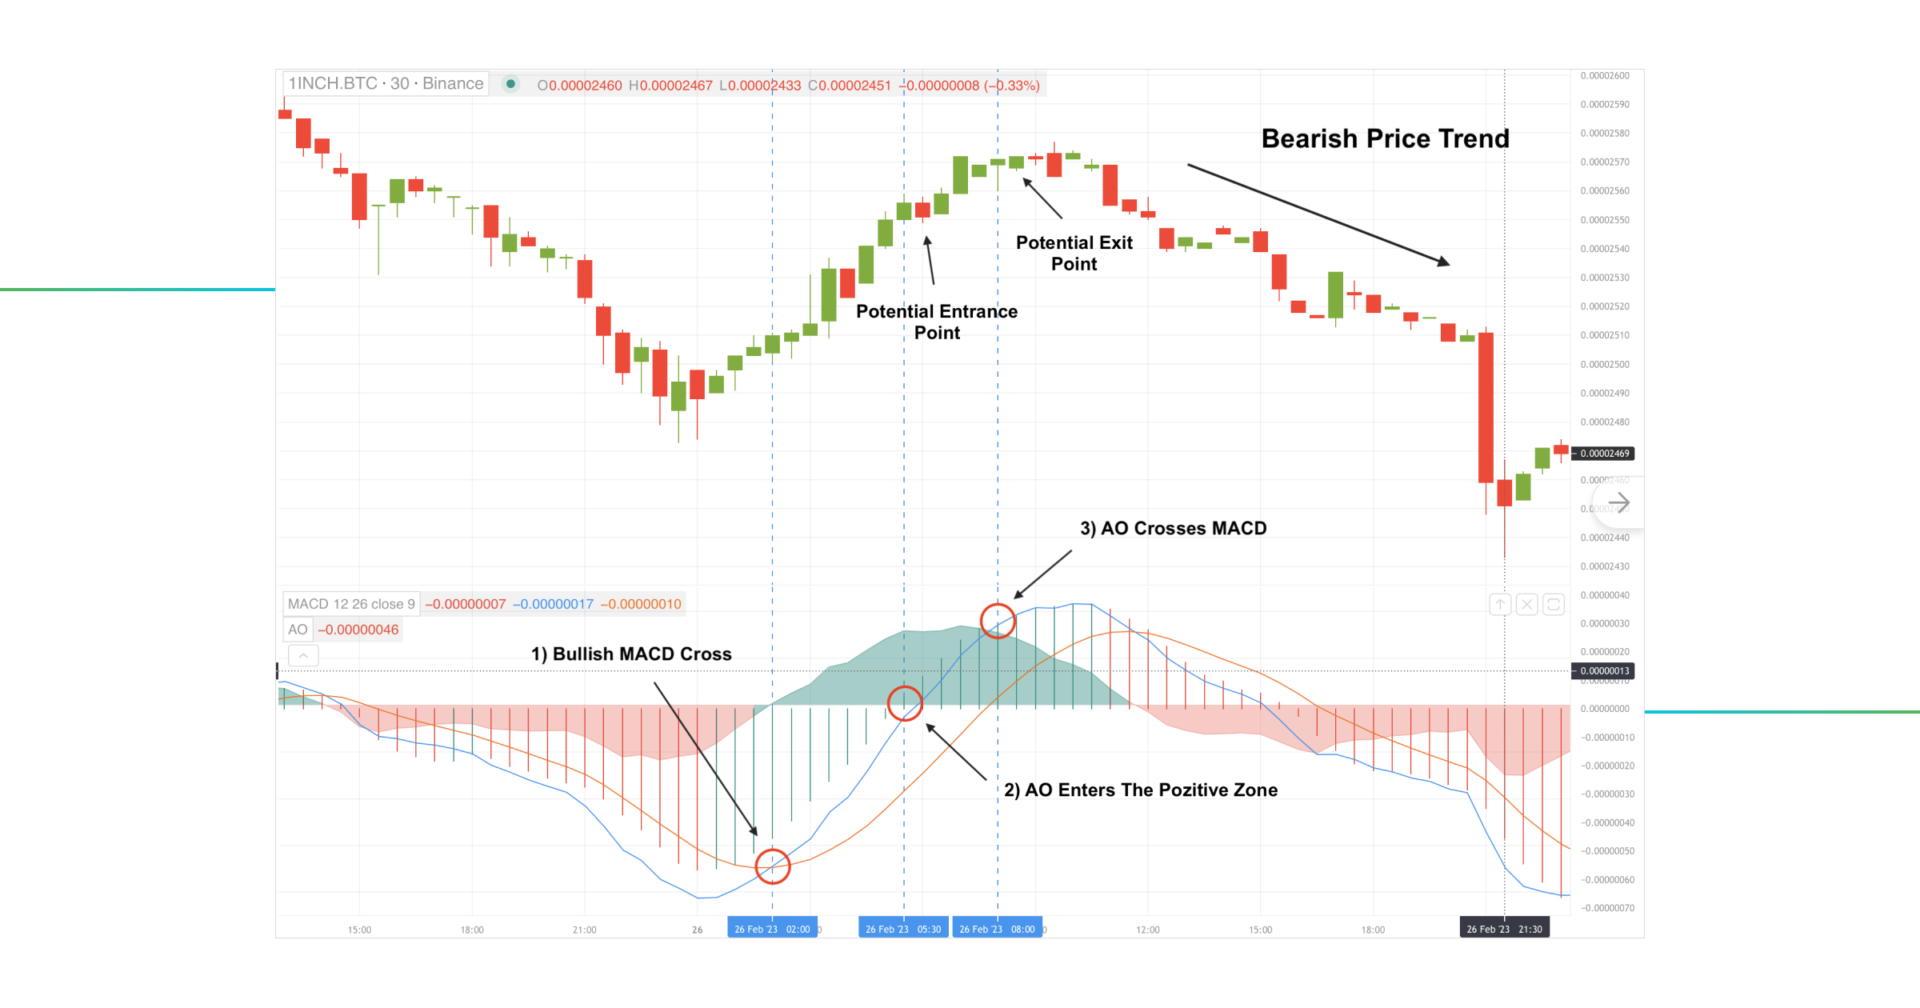
- Combine with RSI/MACD divergence or Bollinger squeeze for higher probability
- Saucer signals closest to zero line often the strongest.
- Risk 1–2% per trade and backtest on your pairs
Awesome Oscillator adds clear visual momentum confirmation to the 9–15 EMA strategy — excellent for timing crypto trend continuations and early reversals with histogram colour changes.